Sustainability
@ Royal Society Chemistry
6. Image Management
6.1 Media Library and Image upload
In order to upload an image to your website, you can upload it to the media library, this way you will always have that image available on your website in case you need to reuse it or edit several instances of it. (check the example image below).
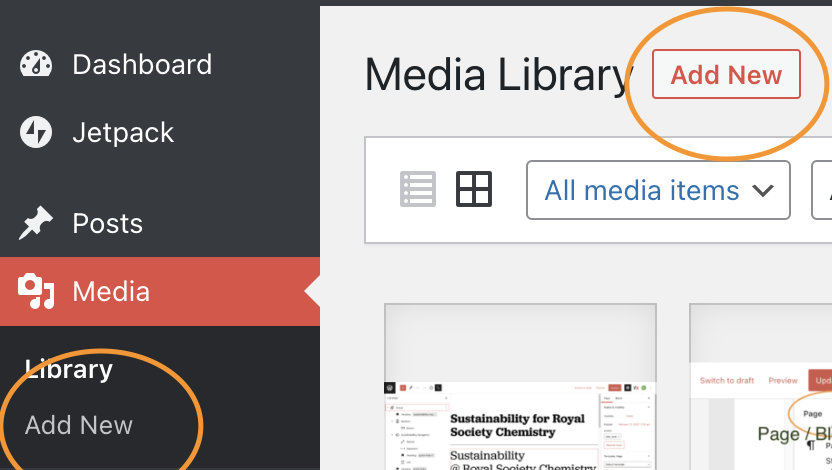
As you can see in the image, if you go to media, you can access the media library to see all your assets, and from here, you have two options to add a new picture. This will prompt you to upload the new picture to the library.
6.1.1 Add an Image Block
When choosing any method to add new block, you can choose the image block from the block library or if you have press the enter key at the end of a paragraph and a new empty paragraph has appear below it, you can press “/” and you then can choose the next block, choose Image and finally upload a new asset or choose one from the media library.
6.1.2 Image Block Options
There are two main areas where you can edit an image block. One is the image block toolbar that appears over the block once you have selected it. The second one is the Settings Sidebar (Block), also will be available when an Image block is selected. Just click on the gear symbol next to Update or Publish buttons on the top right corner of the screen.
You can easily round your images with WordPress, once you have uploaded a picture and created a block with it, you will have on your Settings sidebar (Block) an options for border-radius. You just have to specify a number which will define how rounded the curves of the image are, the higher the number, the more rounded the edged the image will have.
6.2 Images and Layout
The following are a few quick and easy edits you can apply to your images that will go a long way into personalising content.
6.2.1 Border Radius
You can easily round your images with WordPress, once you have uploaded a picture and created a block with it, you will have on your block options sidebar an options for border-radius. You just have to specify a number which will define how rounded the curves of the image are, the higher the number, the more rounded the edged the image will have.
6.2.2 Sizing and Cropping Images
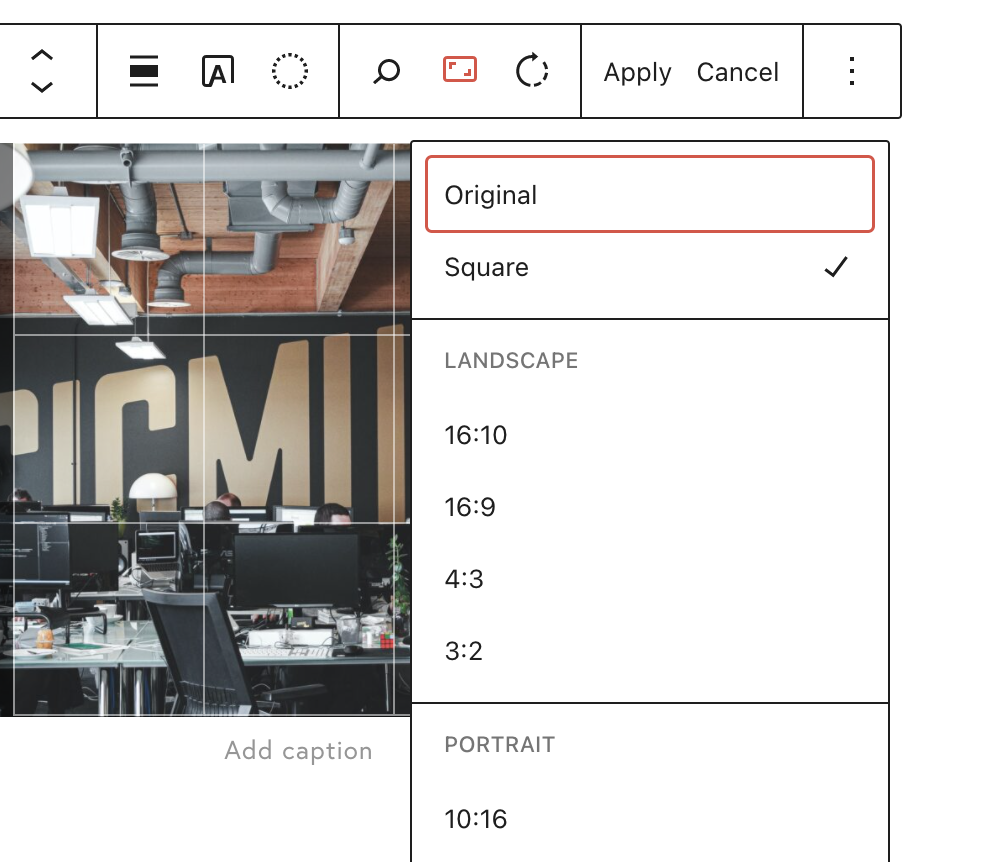
Cropping an image from the editor is very simple. You have to select the picture you have added so the options appear. Then you must select Crop, the option bar will slightly change to fit a another option which is called “Aspect Ratio”, this will trigger a dropdown with the options available.
Finally you can move the whole image to fit to the newly aspect ratio.
Image editing – Ratios (example image to the left side)
6.3 Colouring and Contrast
You can also modify the colour of a picture by applying duotone filters to the image. This is easy to imagine as making a picture that originally had colour into black & white, we are applying a black & white (duotone) filter to the picture.
6.3.1 Applying Filters and Transparency
You have several duotone filters to chose from (as shown in the example picture below). In terms of transparency, you can use a toggle bar that sits on the block options sidebar on the right, once you have selected your image block.
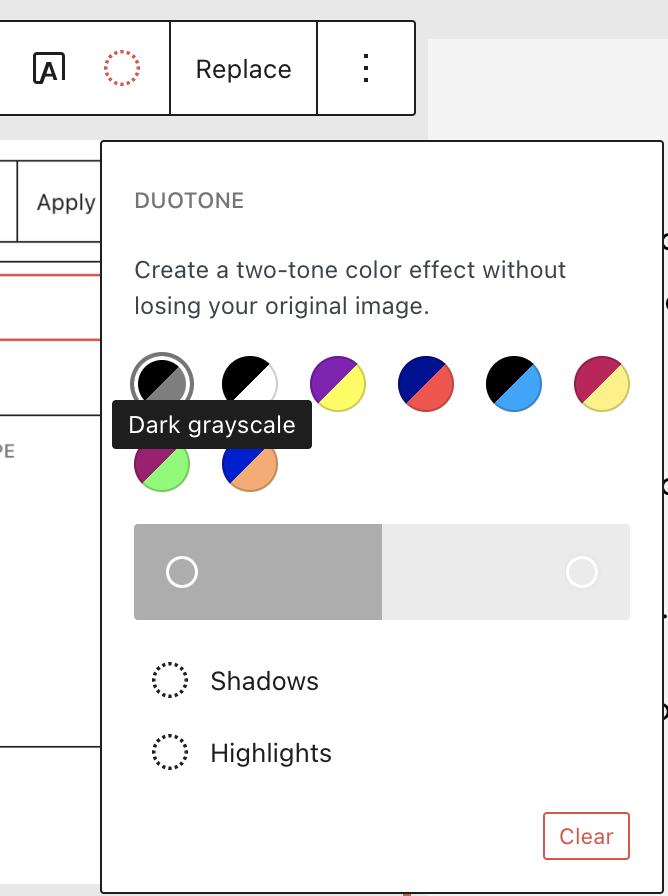
The circle on the block options of the image block will display this duotone menu, you can safely try any of the filters to see the results and then change it back if you don’t like it.
6.3.2 Background and Image contrast
The important aspect to consider when choosing an image over a background or a background under an image is how the colours are going to clash with each other or how the text colour can have enough contrast with the background in order to be readable enough for those with impaired vision.
If you wish to apply a background to a block or several blocks, you would need to group them together. You can do so on the three dots that appear at the end of the block options and select group.
If you need to group more blocks into this newly created group you can use list view and drag them into the group.
6.3.3 Halftone Banner
In order to make a Halftone Banner we need to create first a Full Width Group. This group can contain something, usually a heading or an image. You must go to the group block toolbar and go to Change the alignment to Full Width. Still with the group selected, go into the Settings Sidebar (Block) and reach a dropdown field called Color, open it and select Background, up on the small box that appears select Gradient. (see example image below)
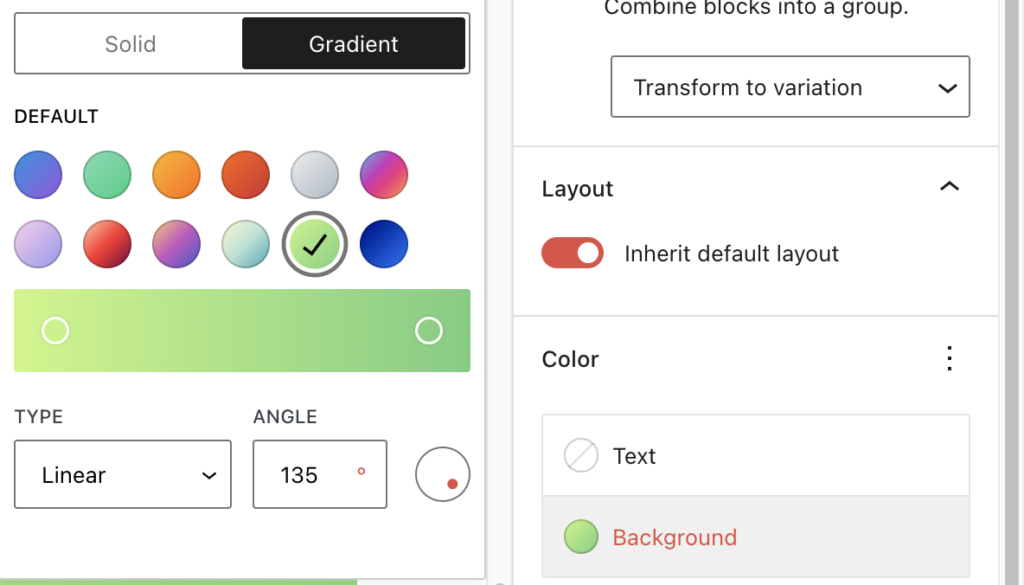
As you can see on the picture, the left panel controls the colour. you can mix 2 or 3 different colours and drag the circles within the colour bar to change how much area that specific colour is occupying. Down below you can choose the angle of the distribution and the type of mixing between the two colours. In this case, the easiest way to get the Halftone Banner is to play around with this controllers until you get nice result in the end.